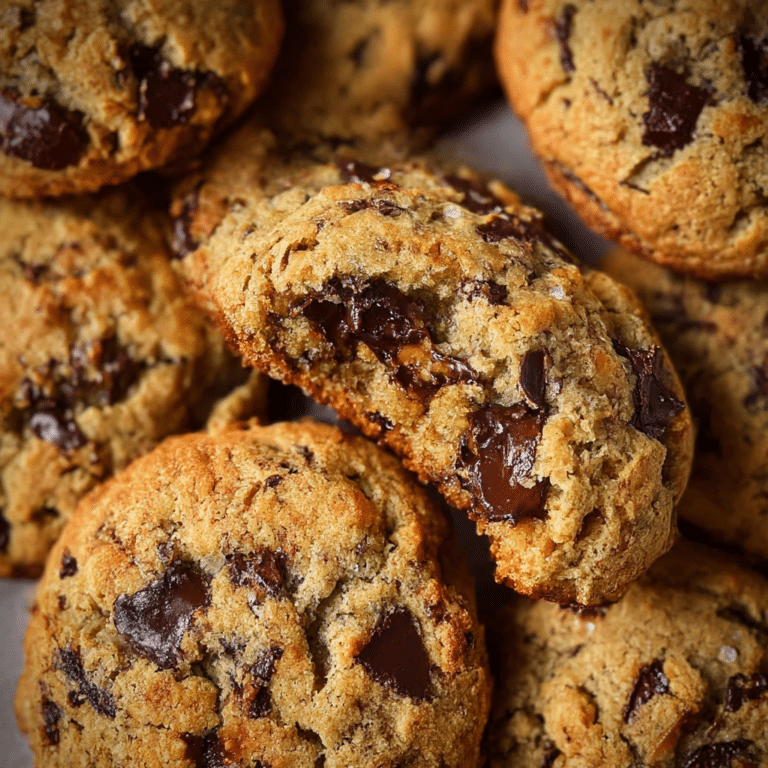
Boston Cream Pie Cookies
If you have a sweet tooth and adore the classic dessert Boston Cream Pie, then you’re going to fall head over heels for these Boston Cream Pie Cookies. They bring together the best of both worlds: soft, buttery cookies sandwiching rich, creamy vanilla custard and topped with a glossy chocolate glaze. Perfect for any occasion, these Boston Cream Pie Cookies are easy to make and delightfully indulgent, delivering that nostalgic flavor in a portable, shareable treat everyone will love.
Why You’ll Love This Recipe
- Simple Ingredients: Uses pantry staples that are easy to find yet deliver rich, authentic flavors.
- Perfect Texture: Soft, moist cookies with creamy filling create the ultimate bite-sized dessert experience.
- Versatile Treat: Great for parties, gifts, or a cozy indulgence at home.
- Quick and Easy: No complicated techniques, just straightforward steps anyone can follow.
- Customizable: You can tweak the filling and glaze for your personal twist.
Ingredients You’ll Need
Every ingredient in this Boston Cream Pie Cookies recipe plays a special role, combining to form a cookie that’s flavorful, tender, and beautifully balanced. From the vanilla bean custard filling to the decadent chocolate glaze, these simple components work together to create magic.
- All-purpose flour: Provides structure with a tender crumb texture, essential for holding the custard filling.
- Unsalted butter: Adds richness and a luscious mouthfeel, perfect for soft cookies.
- Sugar (granulated and powdered): Granulated sugar helps with creaming and structure, while powdered sugar keeps the glaze smooth and sweet.
- Eggs: Bind the dough and create moisture for soft cookies and silky custard.
- Vanilla extract or vanilla bean paste: Infuses warmth and authentic flavor throughout the filling and dough.
- Heavy cream: Used in the custard for creaminess that melts in your mouth.
- Cornstarch: Thickens the custard without curdling, ensuring smooth filling.
- Dark chocolate or semisweet chocolate: For the classic chocolate glaze topping, adding a rich contrast.
- Salt: Balances sweetness and enhances flavor complexity.
Variations for Boston Cream Pie Cookies
One of the best things about this recipe is how easy it is to customize Boston Cream Pie Cookies to your taste or dietary needs. Whether you want to switch things up or accommodate preferences, these variations keep things exciting.
- Gluten-Free Option: Swap all-purpose flour for a gluten-free blend that’s suitable for baking to keep the cookie texture intact.
- Salted Caramel Filling: Replace the vanilla custard with a homemade salted caramel to elevate the flavor profile.
- Vegan Version: Use plant-based butter, coconut milk custard, and dairy-free chocolate for a cruelty-free delight.
- Flavored Glaze: Add a hint of coffee or orange zest to the chocolate glaze for a unique twist.
- Mini Cookie Bites: Make smaller versions for bite-sized party favors or kid-friendly snacks.

How to Make Boston Cream Pie Cookies
Step 1: Prepare the Vanilla Custard Filling
Begin by whisking together egg yolks, sugar, and cornstarch in a bowl until smooth. Slowly add warmed heavy cream while stirring constantly to temper the eggs. Transfer to a saucepan and cook over medium heat until thickened, then remove from heat and stir in vanilla extract. Cover the custard with plastic wrap touching its surface and chill in the fridge until firm.
Step 2: Make the Cookie Dough
Cream softened butter and granulated sugar together until light and fluffy using a mixer. Beat in the egg and vanilla extract. Gradually add the flour and salt, mixing just until combined to keep the dough tender. Wrap the dough in plastic and chill for at least 30 minutes to make shaping easier.
Step 3: Bake the Cookies
Preheat your oven to 350°F (175°C). Roll the dough into small balls and place on a parchment-lined baking sheet, spacing them evenly. Flatten slightly with your hand or the bottom of a glass. Bake for 10-12 minutes or until the edges start to turn golden. Let the cookies cool completely on a wire rack.
Step 4: Assemble the Boston Cream Pie Cookies
Once cookies are cool, spread or pipe a generous layer of the chilled vanilla custard onto the flat side of one cookie, then sandwich with a second cookie. Press gently to adhere but avoid squeezing out the filling.
Step 5: Prepare the Chocolate Glaze
Melt dark or semisweet chocolate with a little butter or heavy cream until smooth and glossy. Dip the top of each cookie sandwich into the glaze or drizzle it over the top with a spoon. Place assembled cookies on parchment paper and allow the glaze to set completely before serving.
Pro Tips for Making Boston Cream Pie Cookies
- Chill the dough: Cold dough prevents spreading and keeps cookies soft and thick.
- Temper the eggs in custard: Slowly add hot cream to eggs while whisking to avoid scrambling.
- Use real vanilla: Vanilla bean paste or extract adds a richer, authentic custard flavor.
- Cool completely before assembling: Warm cookies or filling can cause melting or sogginess.
- Store assembled cookies carefully: Keep them in a sealed container to maintain freshness and prevent filling drying out.
How to Serve Boston Cream Pie Cookies
Garnishes
Garnish your Boston Cream Pie Cookies with a sprinkle of powdered sugar or finely chopped toasted nuts for added texture and visual appeal. Fresh berries or edible flowers can also brighten up the presentation for special occasions.
Side Dishes
Pair these cookies with a cup of rich coffee, hot chocolate, or classic black tea to complement the custard and chocolate flavors. A scoop of vanilla ice cream or fresh whipped cream on the side creates an extra indulgent dessert experience.
Creative Ways to Present
Serve Boston Cream Pie Cookies on a tiered dessert stand for elegant gatherings, or package them individually in clear cellophane bags tied with a ribbon to give as thoughtful homemade gifts. You can also arrange them on a decorative platter sprinkled with cocoa powder or chocolate shavings for a show-stopping look.
Make Ahead and Storage
Storing Leftovers
You can store leftover Boston Cream Pie Cookies in an airtight container in the refrigerator for up to 3 days. The custard filling stays fresh and the cookie texture remains soft, making it just as enjoyable the next day.
Freezing
For longer storage, freeze the assembled cookies individually wrapped in plastic wrap inside a freezer-safe container. They keep well for up to one month. Thaw overnight in the refrigerator before serving to maintain the creamy filling and soft cookie texture.
Reheating
If you prefer warm Boston Cream Pie Cookies, gently warm them in a low-temperature oven (around 300°F or 150°C) for 5-7 minutes after removing from the fridge. Avoid microwaving as it can melt the filling unevenly and affect the cookie structure.
FAQs
Can I make Boston Cream Pie Cookies without eggs?
Yes! You can substitute eggs with alternatives like flax eggs or commercial egg replacers in both the cookie dough and custard, but note that the texture might be slightly different.
What type of chocolate works best for the glaze?
Use good quality semisweet or dark chocolate for a smooth, rich glaze that balances the sweetness of the custard and cookies perfectly.
How long will the custard filling keep?
The vanilla custard filling should be kept refrigerated and is best used within 3-4 days for optimal freshness and safety.
Can I prepare the custard filling ahead of time?
Absolutely! The custard can be made up to two days in advance and refrigerated until you’re ready to assemble the cookies.
Are Boston Cream Pie Cookies suitable for kids?
Yes, they are a kid-friendly treat, but keep in mind they contain eggs and dairy. You can modify the recipe to be allergy-friendly if needed.
Final Thoughts
If you’re craving a nostalgic dessert with a fresh twist, these Boston Cream Pie Cookies are a must-try. They combine softness, creaminess, and chocolate decadence in a delightful little package. Whether you’re baking for a party, gift, or just your own sweet moment, making these will surely bring smiles all around. So grab your ingredients and start creating your own batch of irresistible Boston Cream Pie Cookies today!
Related Posts
- Pistachio & Raspberry Cheesecake Domes
- Mini Peach and Cream Cheese Tarts
- Chocolate Raspberry Mousse Cake
Boston Cream Pie Cookies
Boston Cream Pie Cookies combine soft, buttery cookies with rich vanilla custard filling and a glossy chocolate glaze. This easy-to-make, nostalgic treat delivers classic Boston Cream Pie flavors in a portable, bite-sized dessert perfect for any occasion.
- Prep Time: 40 minutes
- Cook Time: 12 minutes
- Total Time: 1 hour 10 minutes
- Yield: 24 cookies (12 sandwiches) 1x
- Category: Dessert
- Method: Baking
- Cuisine: American
- Diet: Gluten Free
Ingredients
Cookie Dough
- 1 ¾ cups all-purpose flour (or gluten-free blend for gluten-free option)
- ½ cup unsalted butter, softened
- ⅔ cup granulated sugar
- 1 large egg
- ½ teaspoon vanilla extract or vanilla bean paste
- ¼ teaspoon salt
Vanilla Custard Filling
- 3 large egg yolks
- ⅔ cup granulated sugar
- 3 tablespoons cornstarch
- 1 ¼ cups heavy cream, warmed
- 1 teaspoon vanilla extract or vanilla bean paste
Chocolate Glaze
- 4 ounces dark chocolate or semisweet chocolate, chopped
- 1 tablespoon unsalted butter or heavy cream
- Powdered sugar (optional, for garnish)
Additional
- Optional garnishes: finely chopped toasted nuts, fresh berries, edible flowers
Instructions
- Prepare the Vanilla Custard Filling: Whisk together the egg yolks, granulated sugar, and cornstarch in a bowl until smooth. Slowly add the warmed heavy cream while stirring constantly to temper the eggs. Transfer the mixture to a saucepan and cook over medium heat, stirring continuously, until thickened. Remove from heat and stir in vanilla extract. Cover the custard with plastic wrap directly on its surface and chill in the refrigerator until firm.
- Make the Cookie Dough: Using a mixer, cream the softened butter and granulated sugar together until light and fluffy. Beat in the egg and vanilla extract. Gradually add the flour and salt, mixing just until combined to keep the dough tender. Wrap the dough in plastic wrap and chill for at least 30 minutes to make shaping easier.
- Bake the Cookies: Preheat the oven to 350°F (175°C). Roll the dough into small balls and place them evenly spaced on a parchment-lined baking sheet. Flatten each ball slightly with your hand or the bottom of a glass. Bake for 10-12 minutes until the edges start to turn golden. Allow the cookies to cool completely on a wire rack.
- Assemble the Boston Cream Pie Cookies: Once the cookies are cooled, spread or pipe a generous layer of chilled vanilla custard onto the flat side of one cookie. Sandwich it with a second cookie and gently press together without squeezing out the filling.
- Prepare the Chocolate Glaze: Melt the dark or semisweet chocolate with butter or heavy cream in a heatproof bowl over simmering water or in short bursts in the microwave until smooth and glossy. Dip the top of each cookie sandwich into the glaze or drizzle the glaze over the cookies. Place them on parchment paper and allow the glaze to set completely before serving.
Notes
- Chill the dough before baking to prevent spreading and maintain cookie thickness.
- Temper the eggs in the custard by slowly adding hot cream while whisking to avoid scrambling.
- Use real vanilla bean paste or extract for an authentic custard flavor.
- Ensure cookies are completely cool before assembling to prevent melting or sogginess.
- Store assembled cookies in a sealed container to keep filling fresh and prevent drying out.
Nutrition
- Serving Size: 1 cookie sandwich
- Calories: 220
- Sugar: 18g
- Sodium: 85mg
- Fat: 12g
- Saturated Fat: 7g
- Unsaturated Fat: 3g
- Trans Fat: 0g
- Carbohydrates: 24g
- Fiber: 1g
- Protein: 3g
- Cholesterol: 65mg
Keywords: Boston Cream Pie Cookies, vanilla custard cookies, chocolate glaze cookies, buttery cookies, homemade cookies, dessert, gluten-free dessert