Easy Salmon Sushi Bake Recipe to Try Tonight
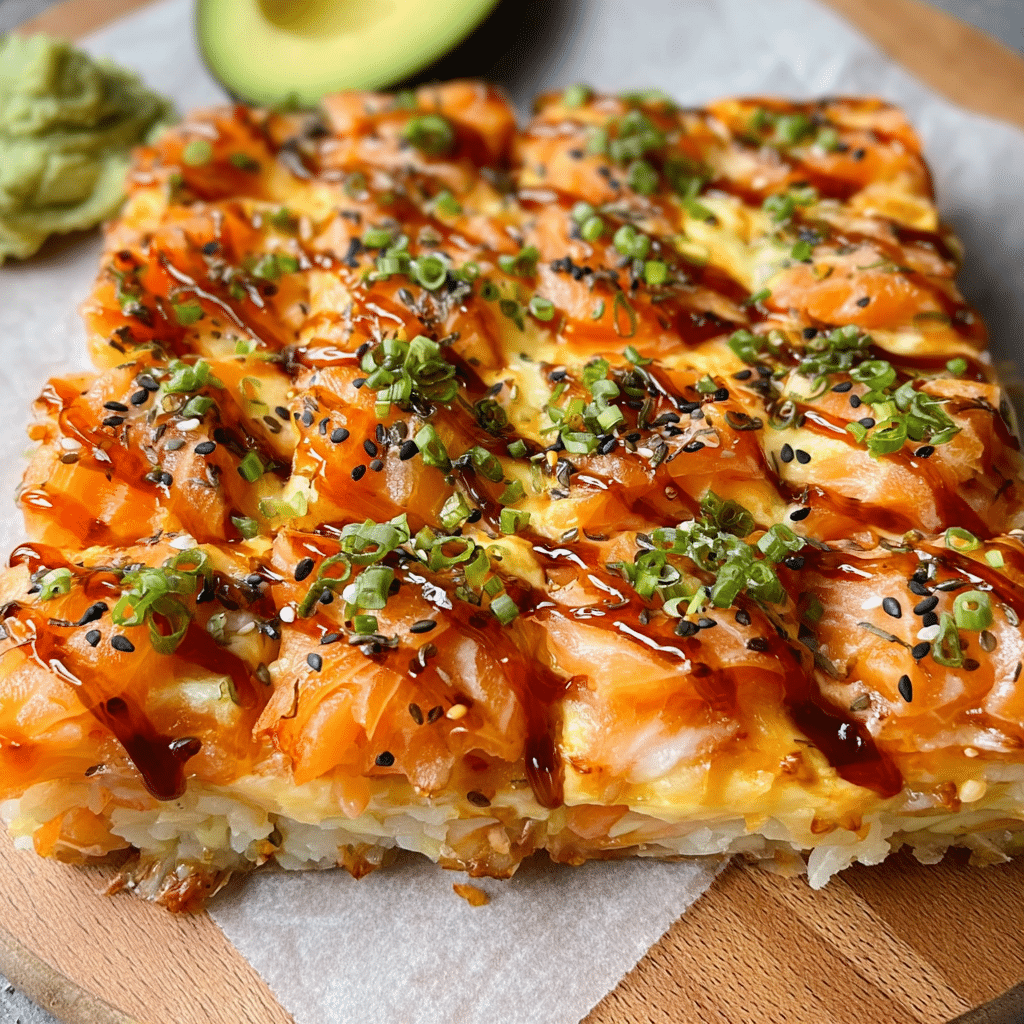
If you’re craving sushi but want a cozy, baked twist for dinner, this Salmon Sushi Bake Recipe is exactly what you need. It brings together creamy, rich flavors, tender baked salmon, and perfectly seasoned sushi rice in one irresistible casserole that’s ready in under an hour. Whether you’re feeding a family or enjoying a comforting solo meal, this recipe delivers the deliciousness of sushi without the complexity of rolling sushi. Let’s dive into this easy, flavorful dish you’ll want to make again and again.
Why You’ll Love This Recipe
- Simple Prep: Minimal ingredients and easy steps make this perfect for weeknight dinners.
- Comfort Food Vibes: Warm, creamy, and satisfying without losing sushi’s fresh flair.
- Customizable: Adapt with your favorite seafood or veggies to suit any taste.
- Great for Sharing: Makes enough to feed a crowd or savor as leftovers.
- Family Friendly: The mild flavors appeal to kids and adults alike.
Ingredients You’ll Need
Each ingredient plays a key role in building the perfect balance of flavor, texture, and color in this dish. From the vinegared sushi rice to the creamy mayo-based sauce, everything is thoughtfully simple but essential.
- Sushi Rice: Short-grain rice seasoned with vinegar brings the traditional sushi base.
- Fresh Salmon: Use sashimi-grade or fresh fillets for tender, flavorful bites.
- Mayonnaise: Adds creaminess and richness, binding the flavors together.
- Sriracha or Chili Sauce: Offers a subtle spicy kick to awaken taste buds.
- Nori Sheets or Flakes: Adds a touch of oceanic umami and garnish.
- Cucumber or Avocado: Fresh, creamy veggies add brightness and texture contrast.
- Scallions: Provide a sharp, fresh note and a pop of green color.
Variations for Salmon Sushi Bake Recipe
Feel free to get creative! This recipe is incredibly adaptable, so whether you’re avoiding dairy, prefer different proteins, or want to punch up the spice level, you can easily make tweaks that suit your tastes.
- Swap the Fish: Try crab, shrimp, or cooked tuna instead of salmon for variety.
- Dairy-Free Version: Use vegan mayo or avocado to replace traditional mayo.
- Extra Veggies: Add thinly sliced radishes, bell peppers, or edamame for color and crunch.
- Spicy Upgrade: Mix in wasabi or increase sriracha for more heat.
- Gluten-Free: Ensure sauces and condiments are gluten-free, and serve with tamari.

How to Make Salmon Sushi Bake Recipe
Step 1: Prepare the Sushi Rice
Start by rinsing the sushi rice several times until the water runs clear to remove excess starch. Cook the rice according to package instructions, then gently fold in a mixture of rice vinegar, sugar, and salt while the rice is warm to give it that signature sushi flavor.
Step 2: Mix the Salmon Topping
Flake the fresh salmon into bite-sized pieces, then combine with mayo, sriracha (or your chosen chili sauce), and finely chopped scallions to create a creamy, spicy topping that complements the rice perfectly.
Step 3: Assemble the Bake
In a baking dish, evenly press the sushi rice into the bottom layer, creating a compact base. Spread the salmon mixture evenly over the rice for a neat and luscious top layer.
Step 4: Bake Until Golden
Preheat your oven to 375°F (190°C) and bake the dish for about 15 to 20 minutes, or until the salmon topping is lightly browned and bubbling. This step melds all the flavors and gives the bake a lovely texture.
Step 5: Garnish and Serve
Once out of the oven, add your choice of garnishes like sliced avocado, nori flakes, or sesame seeds before slicing into squares for serving.
Pro Tips for Making Salmon Sushi Bake Recipe
- Use Fresh Ingredients: For the best taste, opt for good quality salmon and freshly cooked sushi rice.
- Don’t Overmix the Rice: Folding gently preserves the fluffy texture without making it mushy.
- Customize the Heat: Adjust chili sauce amounts gradually to find your perfect spice level.
- Even Layering: Press the rice firmly but gently for a balanced structure that holds together well.
- Let It Cool Slightly: Allowing the bake to rest before cutting helps keep clean slices.
How to Serve Salmon Sushi Bake Recipe
Garnishes
Top your salmon sushi bake with fresh slices of avocado for creaminess, a sprinkle of sesame seeds for nutty flavor, chopped scallions for brightness, and crispy nori flakes for that distinctive ocean taste. These simple additions bring the dish to life visually and flavor-wise.
Side Dishes
This salmon sushi bake pairs beautifully with light sides like a crisp cucumber salad tossed with rice vinegar or steamed edamame sprinkled with sea salt. Miso soup or pickled ginger on the side also complements the meal perfectly without overpowering the main dish.
Creative Ways to Present
Serve the bake in individual ramekins for a chic, personal touch or set it out as a crowd-pleasing casserole. For parties, offer bowls of sliced veggies, soy sauce, and wasabi on the side so everyone can customize their bites.
Make Ahead and Storage
Storing Leftovers
Store any leftover salmon sushi bake in an airtight container in the refrigerator for up to 3 days. Cover tightly to prevent the rice from drying out and to maintain the creamy topping’s texture.
Freezing
While you can freeze the salmon sushi bake, it’s best to do so before baking for optimal texture. Wrap tightly with plastic wrap and foil, then freeze for up to 1 month. Thaw in the fridge overnight before baking fresh.
Reheating
Reheat leftovers in the oven at 350°F (175°C) for about 10-15 minutes until warmed through. Avoid the microwave if possible to keep the rice texture intact and prevent the topping from becoming soggy.
FAQs
Can I use cooked salmon instead of raw salmon?
Yes! Using cooked salmon is a great alternative and can make the dish quicker and safer, especially for kids or anyone avoiding raw fish.
Is this recipe gluten-free?
It can be, as long as you use gluten-free soy sauce or tamari and double-check all other ingredients for hidden gluten.
Can I make this recipe vegan?
To make it vegan, substitute the salmon with marinated tofu or cooked mushrooms and use vegan mayonnaise instead of regular mayo.
How spicy is the salmon sushi bake?
The spice level depends on how much sriracha or chili sauce you add; you can adjust the heat to mild or spicy based on your preference.
What’s the best way to serve leftovers?
Leftovers are delicious cold or reheated, and you can also turn them into sushi bowls by serving with extra fresh veggies and seaweed snacks.
Final Thoughts
If you love sushi and comfort food, you’re going to adore this Salmon Sushi Bake Recipe. It’s straightforward, packed with flavor, and perfect for any night of the week when you want something cozy yet impressive. Grab your ingredients, have fun with the variations, and enjoy a warm twist on your favorite Japanese flavors right from your own oven!
Related Posts
- Exciting Beef Steak and Pasta Cooking Ideas to Try
- Easy Pineapple Chicken and Rice Recipe to Try Today
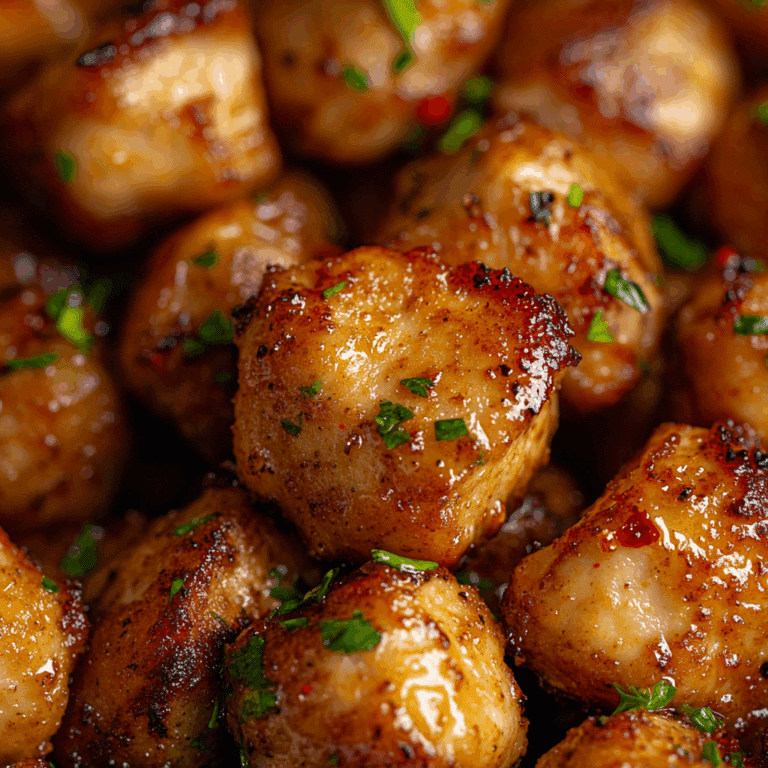
- Why Garlic Butter Chicken Bites Are Irresistible
Salmon Sushi Bake Recipe

This Salmon Sushi Bake is a cozy, baked twist on traditional sushi, combining tender baked salmon, creamy mayo-based sauce, and perfectly seasoned sushi rice in an easy casserole. Ready in under an hour, it’s perfect for a comforting weeknight dinner or sharing with family and friends, delivering the flavors of sushi without the hassle of rolling.
- Prep Time: 20 minutes
- Cook Time: 20 minutes
- Total Time: 40 minutes
- Yield: 6 to 8 servings 1x
- Category: Appetizers
- Method: Baking
- Cuisine: Japanese-inspired
- Diet: Gluten Free
Ingredients
Sushi Rice
- 2 cups short-grain sushi rice
- 2 1/2 cups water
- 1/4 cup rice vinegar
- 2 tablespoons sugar
- 1 teaspoon salt
Salmon Topping
- 1 lb sashimi-grade fresh salmon fillet, flaked
- 1/2 cup mayonnaise
- 1–2 tablespoons sriracha or chili sauce (adjust to taste)
- 2–3 scallions, finely chopped
Garnishes and Add-ins
- 1 avocado, sliced
- Nori sheets or nori flakes, for garnish
- Sesame seeds, for garnish (optional)
- Cucumber or additional vegetables (optional)
Instructions
- Prepare the Sushi Rice: Rinse the sushi rice several times until the water runs clear to remove excess starch. Cook the rice according to package instructions (using 2 1/2 cups water for 2 cups rice). While still warm, gently fold in the rice vinegar, sugar, and salt mixture to season the rice with the classic sushi flavor.
- Mix the Salmon Topping: Flake the fresh salmon into bite-sized pieces. In a bowl, combine the salmon with mayonnaise, sriracha or your preferred chili sauce, and finely chopped scallions. Mix lightly to form a creamy, spicy topping.
- Assemble the Bake: Press the seasoned sushi rice evenly and firmly into the bottom of a baking dish to create a compact layer. Spread the salmon mixture evenly over the rice for a neat and luscious top layer.
- Bake Until Golden: Preheat your oven to 375°F (190°C). Bake the assembled dish for 15 to 20 minutes, or until the salmon topping is lightly browned and bubbling, allowing the flavors to meld and the bake to develop a lovely texture.
- Garnish and Serve: Remove from the oven and garnish with sliced avocado, nori flakes, sesame seeds, and any additional veggies as desired. Slice into squares and serve warm.
Notes
- Use fresh, high-quality salmon for the best taste and texture.
- Be gentle when folding in the sushi vinegar mixture to maintain fluffy rice.
- Adjust the amount of sriracha or chili sauce to control the heat level.
- Press the rice firmly but gently to ensure the bake holds together well.
- Let the bake rest for a few minutes before slicing to achieve clean, neat pieces.
Nutrition
- Serving Size: 1/8 of recipe
- Calories: 320 kcal
- Sugar: 3 g
- Sodium: 450 mg
- Fat: 18 g
- Saturated Fat: 3.5 g
- Unsaturated Fat: 13 g
- Trans Fat: 0 g
- Carbohydrates: 25 g
- Fiber: 2 g
- Protein: 18 g
- Cholesterol: 50 mg
Keywords: salmon sushi bake, baked sushi, easy sushi casserole, sushi dinner, baked salmon recipe, gluten free sushi